In the world of crisscrossing pipes, the pipe leak clamp silently safeguards the normal operation of the pipeline system. Despite its small size, it shoulders the significant mission of preventing pipeline leaks and avoiding losses.
Structure, principle and type
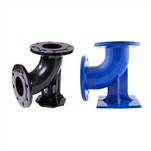
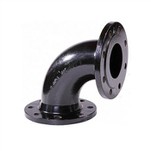
Structure: A pipe leak clamp typically consists of two semi-circular clamping bodies, along with bolts, nuts, and additional components. The inner surface of each clamp body usually features a liner made from rubber or other sealing materials. This liner enhances the sealing effect and protects the pipeline's surface from damage during clamping.
Principle: By installing the pipe leak clamp at the pipeline's leakage point and then tightening the bolt so that the two clamp bodies are tightly together, the pressure of the clamping bodies squeezes the sealing gaskets against the pipeline's surface, thus preventing the fluid inside the pipeline from leaking.
Classified by material: There are metal pipe leak clamps, such as stainless steel, with high strength and corrosion resistance, suitable for various industrial pipelines and some environments with high corrosion resistance requirements. There are also plastic or composite pipe leak clamps, which are light in weight and good in insulation performance, and are often used in some pipelines with low pressure and non-corrosive media, such as water supply and drainage pipes in civil buildings.
Key Points of Installation and Use
Preparation before installation: First, determine the outer diameter of the pipeline, wall thickness, and the location and size of the leak to select the appropriate specification of the pipe leak clamp. At the same time, clean the surface around the pipeline's leakage, and remove oil, rust, debris, etc., to ensure that the clamping body can fit closely with the pipeline.
Installation process: Place the two clamp bodies of the pipe leak clamp on each side of the pipe leak, so that the sealing gasket is aligned with the leak point. Then push the bolt through the mounting hole on the clamp body and screw on the nuts. When tightening the nuts, the method of evenly tightening them diagonally should be adopted to gradually increase the pressure of the clamping body on the pipeline until the leakage stops and the clamping body is firmly installed.
Precautions for use: After installation, check the fastening of the leakage clip regularly, and tighten it in time if it is loose. At the same time, it is necessary to observe whether there is a recurrence of pipeline leakage, if it is found that the leak still exists or there is a new leak point, it should be timely to find the cause and deal with it. In addition, the pipe leak clamp can only be used as a temporary or emergency repair measure, and if conditions permit, the pipeline should be permanently repaired or replaced as soon as possible.
Maintenance and Preservation
Regular inspection: Regularly check whether the appearance of the pipe leak clamp is damaged or deformed and whether the sealing gasket is aging or wearing. If any problem is found, replace the relevant components in time.
Cleaning and maintenance: To maintain the pipe leak clamp, keep it clean to prevent its surface from becoming contaminated with dust, oil, and other debris. For metal pipe leak clamps, applying a suitable amount of anti-rust oil can help prevent rust.
Storage requirements: When not in use, store the pipe leak clamp in a dry, well-ventilated area to protect it from moisture, heat, and mechanical damage. Additionally, organize and categorize pipe leak clamps of different specifications to ensure you can easily find the right product when needed.
Pipe leak clamps, with their simple yet sophisticated design, play a key role in pipe maintenance. By gaining a better understanding, we can utilize it more effectively in pipeline maintenance tasks, ensuring the safe and efficient operation of the pipeline system.